Documentation Index
Fetch the complete documentation index at: https://support.detrics.io/llms.txt
Use this file to discover all available pages before exploring further.
Last updated: August 12, 2025
Get Started
-
Check Detrics connectors in our Website
Visit Detrics connectors to see all available integrations. -
Choose desired connector
Click on the connector you would like to sync to Looker Studio. For example, if you want to connect Meta/Facebook Ads data, click on the Meta connector.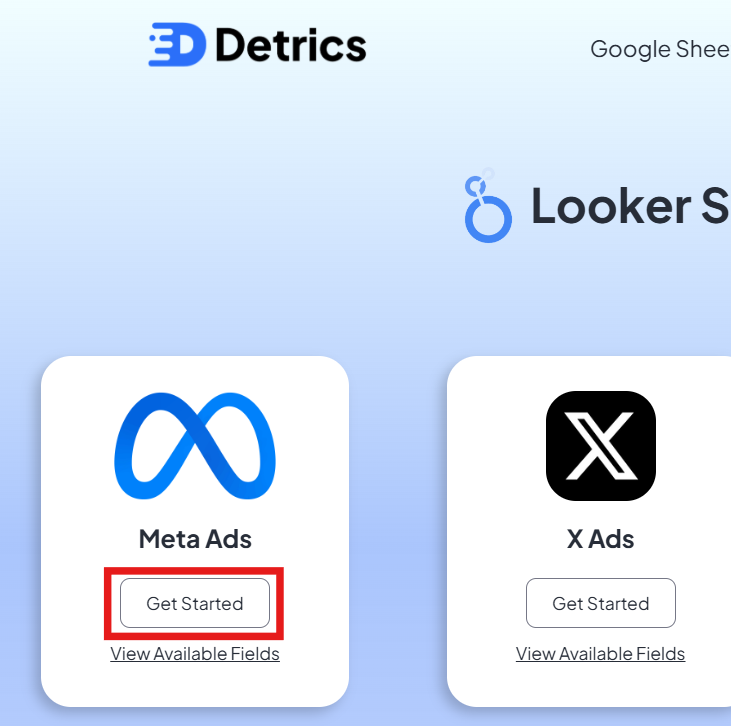
-
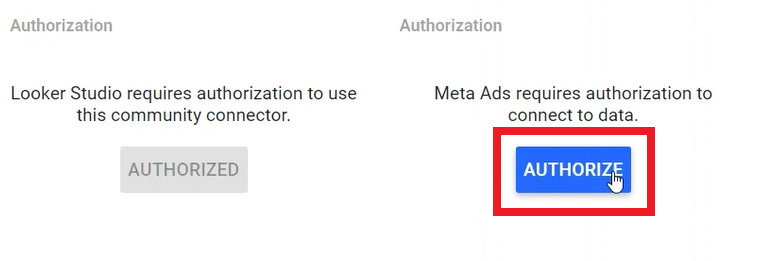
Login with your Google account
Click the “Authorize” button on the left side to register.
-
Authorize platform connection
Click the “Authorize” button on the right side to connect your Data Source (e.g., Meta/Facebook Ads).
-
Select account
Choose the account you want to connect from the dropdown list of available accounts. For Meta/Facebook connectors, you’ll see a list of all your ad accounts.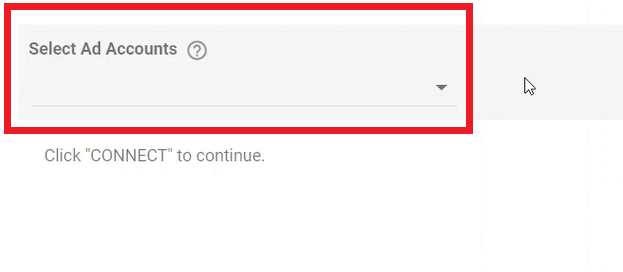
-
Template selection
Some connectors have pre-made templates. Keep the checkbox checked if you want to use a template (recommended for beginners).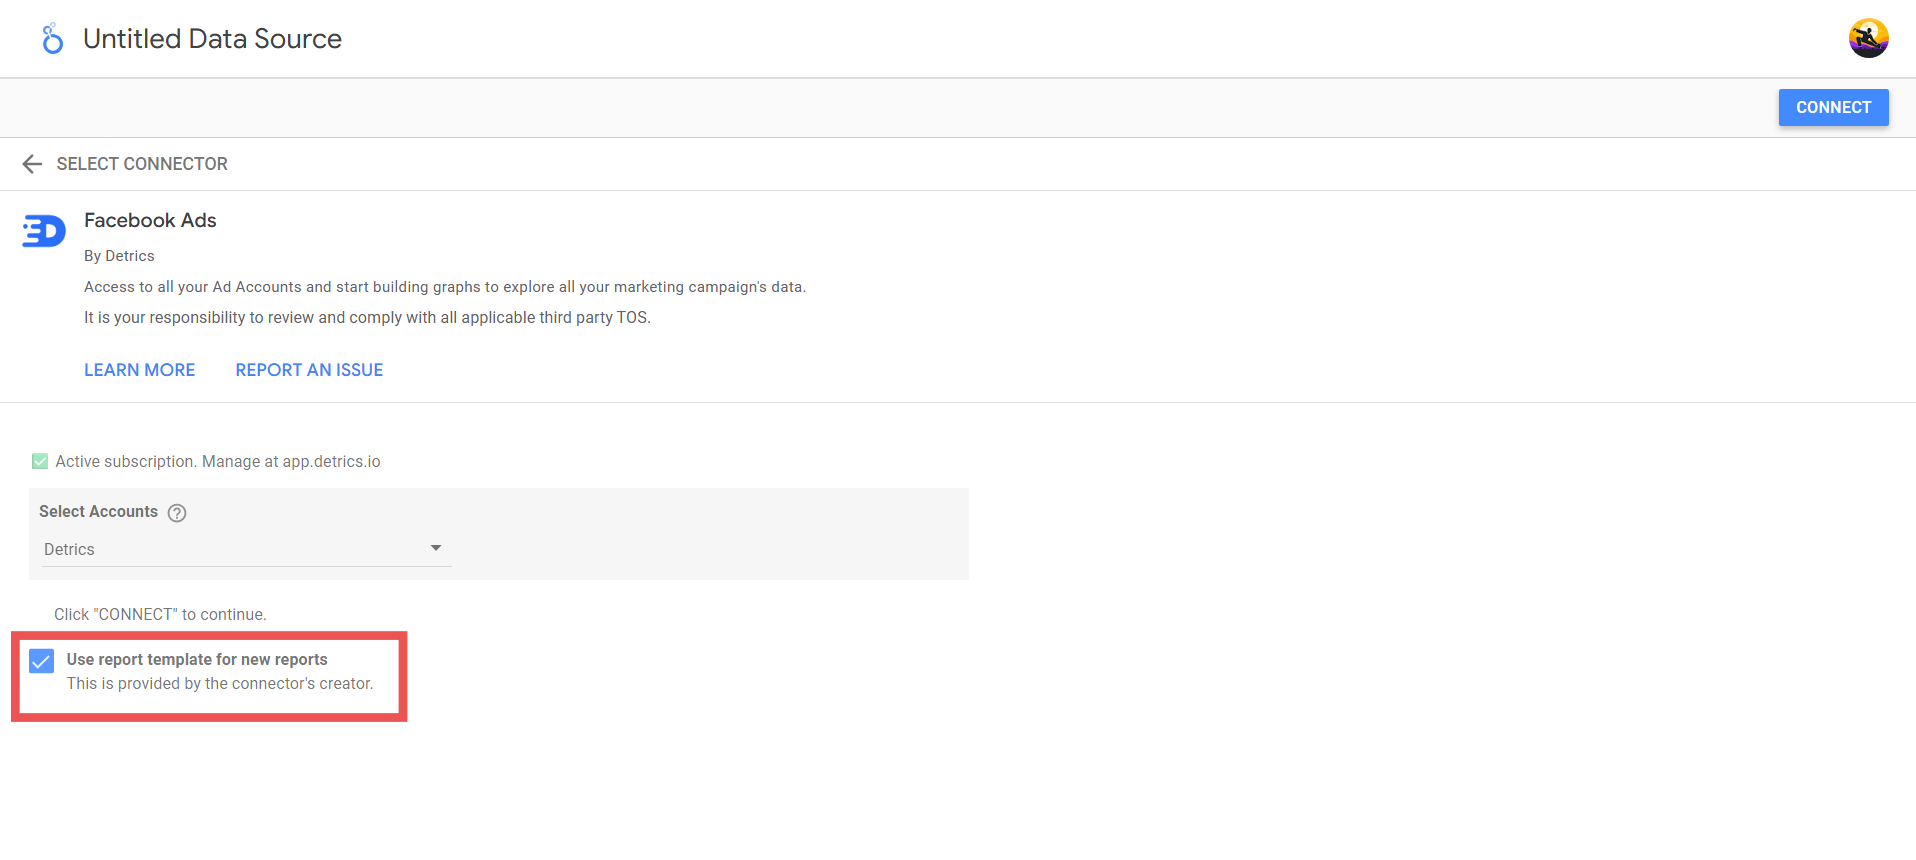
-
Connect data source with Looker
Click the “Connect” button in the top right corner to establish the connection.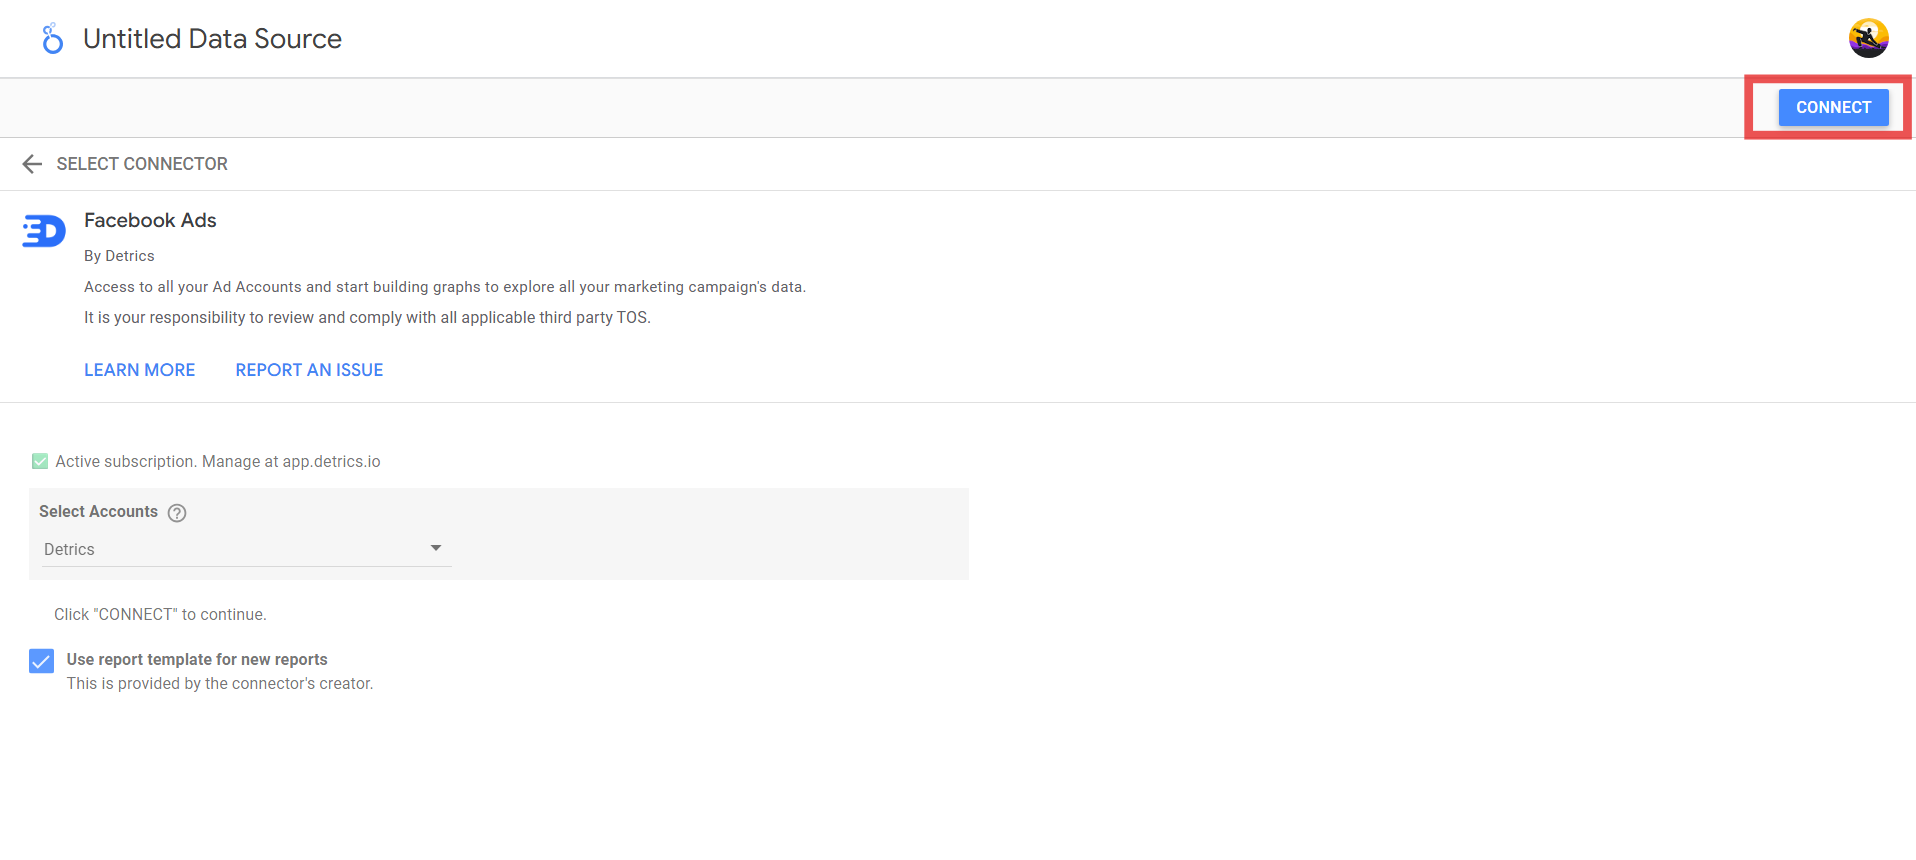
-
Format metrics and dimensions
You might want to change settings like converting text fields to numbers, or a common adjustment is changing “Ad Image” from text to image format to preview the ads that were used.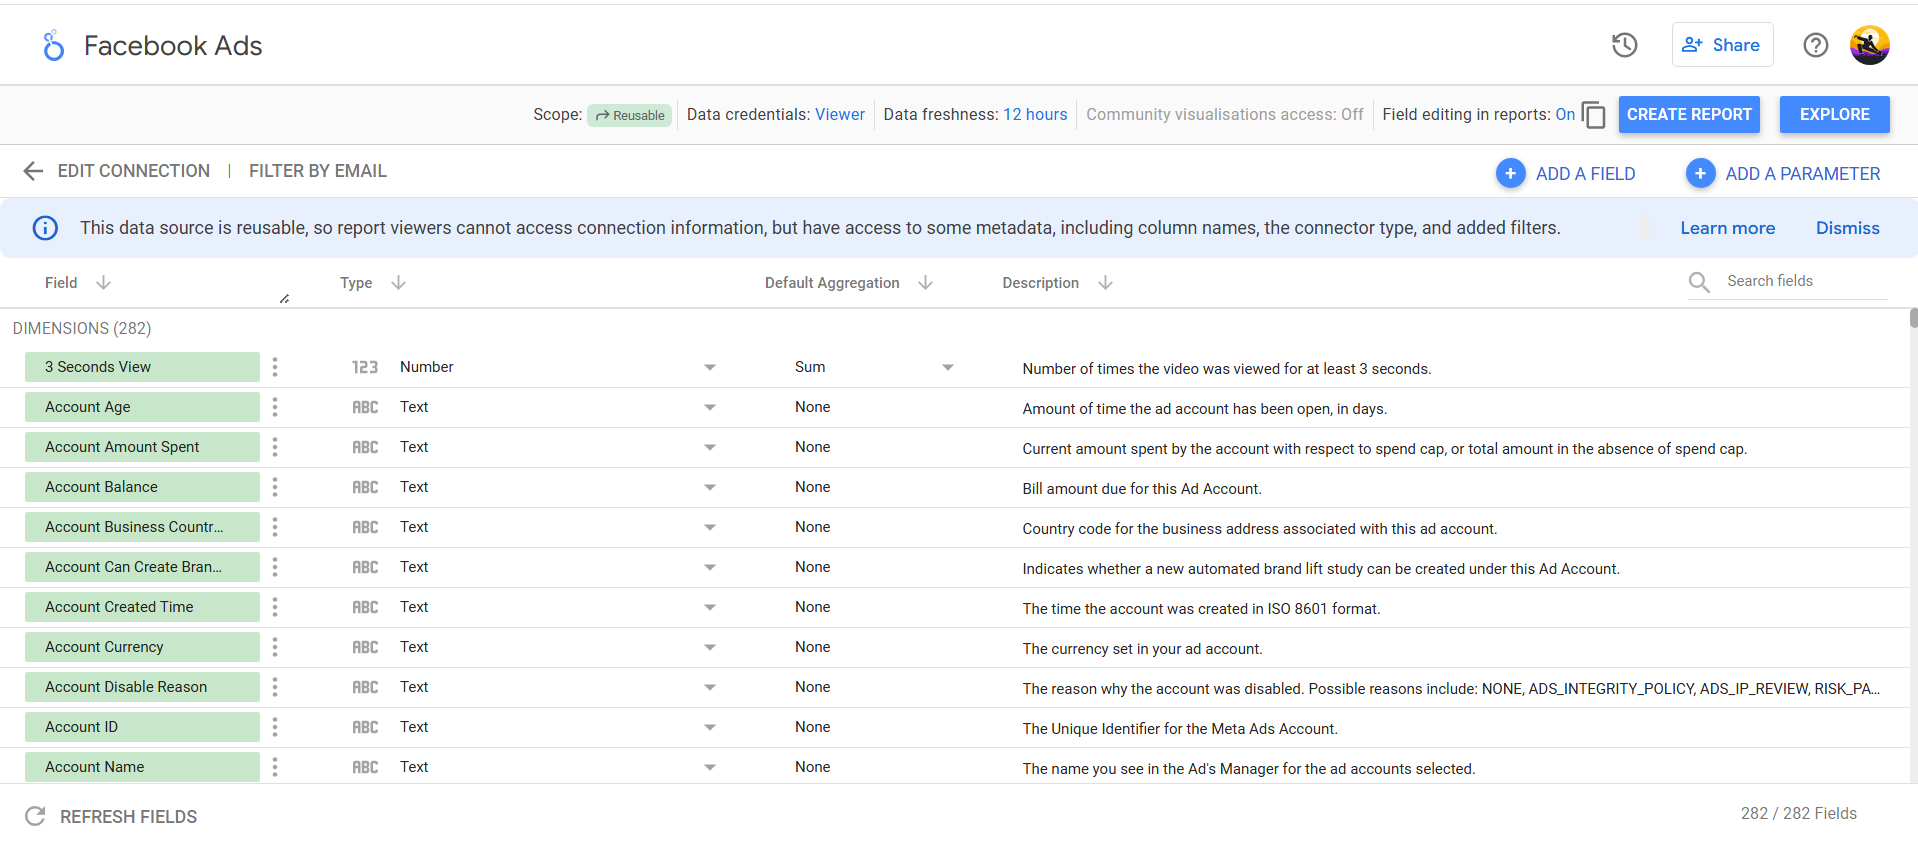
-
Create report
Click the “Create Report” button in the top right corner.
-
Add to Report
Click “Add to Report”. If a pop-up appears, click on “Add to Report” to start building your report.
Important: Your 14-day free trial starts once your first table loads in Looker Studio.
Next Steps
Build Dashboards 10x Faster
Learn performance optimization techniques to dramatically speed up your dashboard creation workflow
Troubleshooting Guide
Find solutions for common issues and learn about advanced features